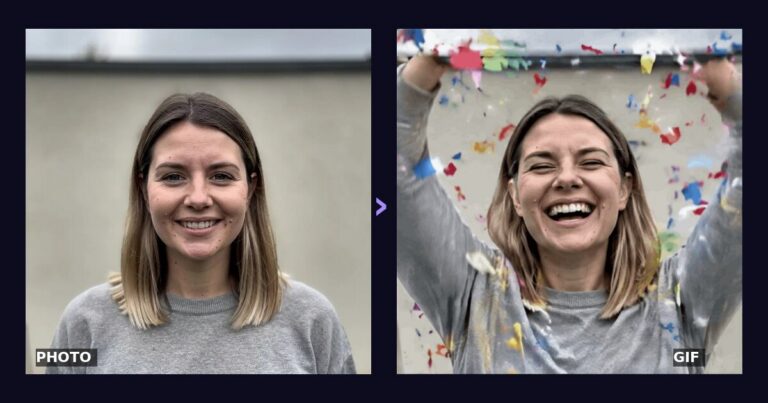
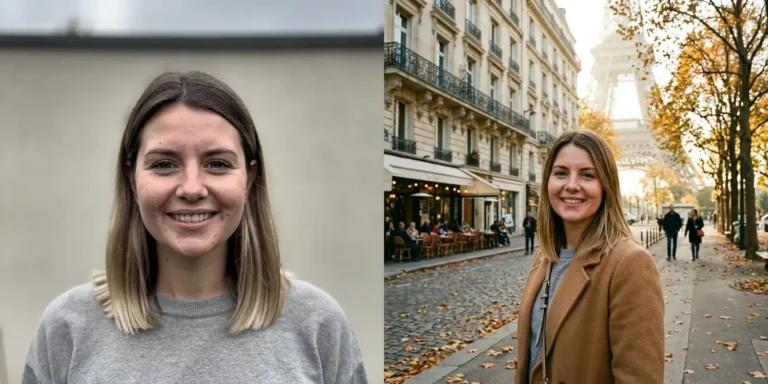
To create an AI image from a photo, upload a clear picture of yourself to an AI image generator that accepts reference photos, describe the new scene in one sentence, and generate. In PixiFixi that takes under a minute: switch the editor to Create, tap “Add yourself”, write where you want to be, pick a format and press Generate. You still look like you; everything else is new. Below are three ways to do it, the settings that keep your likeness, and the mistakes that make AI images stop looking like you.
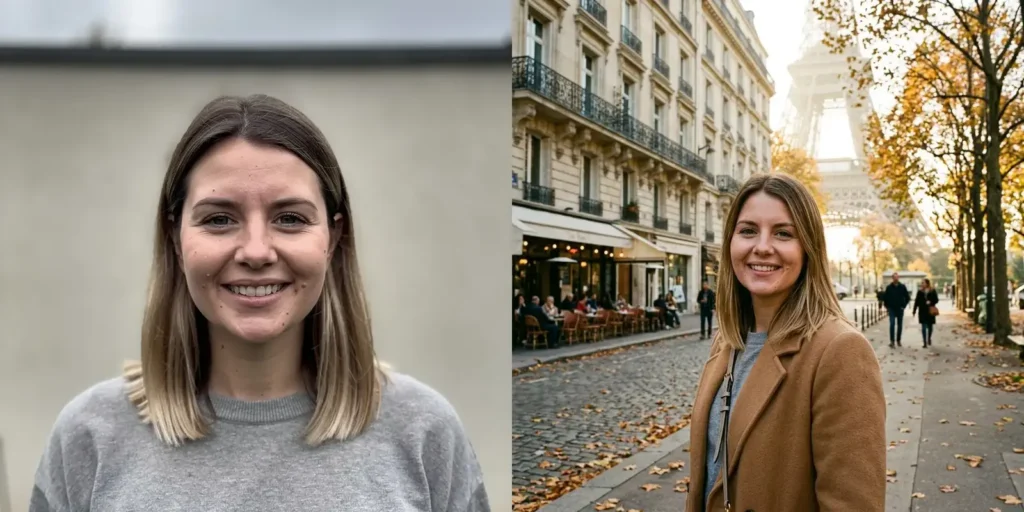
Left: an ordinary portrait. Right: the same person in a new scene, created from the description “standing on a Paris street in autumn with the Eiffel Tower behind her”.
Three ways to create AI images from your photos
“Creating an AI image from a photo” (often called image-to-image AI) can mean three different things, and each needs a different tool in PixiFixi:
What you want
Best method in PixiFixi
Cost
A brand-new scene with you in it (Paris, a beach, a Christmas card)
The rest of this guide focuses on the first one, because it is the most flexible: you decide the whole scene with your own words.
How to create an AI image from a photo in PixiFixi, step by step
Open the editor and switch to Create. At the top of the PixiFixi editor there is an Edit / Create switch. Choose Create, then Image. New here? Start from the AI image generator page — in most countries new accounts get free credits.
Tap “Add yourself” and upload your photo. Pick a sharp photo where your face takes up a good part of the frame. A selfie from arm’s length or a waist-up portrait works better than a full-body shot from far away.
Describe the scene, not your face. Write where you are, what you wear and what the light is like: “standing on a Paris street in autumn, wearing a camel coat, golden hour light”. You don’t need to describe yourself — the photo does that.
Pick a format. Portrait 4:5 for Instagram, story 9:16 for Stories and TikTok, landscape 16:9 for a wallpaper or a cover, square 1:1 for a profile picture.
Choose a style and quality, then press Generate. Standard (about 1000 px on the long side) costs 1 credit and is usually ready in under half a minute; Pro (2K) and Ultra (4K) take longer and cost 4 and 8 credits.
Keep going. Download the image, try again with a tweaked description, or tap “Edit this image” to change the background, remove an object or upscale it.
Step 1: on the empty editor screen, click “No photo? Create one from scratch” or the Create switch at the top.
Your photo can look like this too
Try it on your own picture — no card, no subscription, and you get free credits to start.
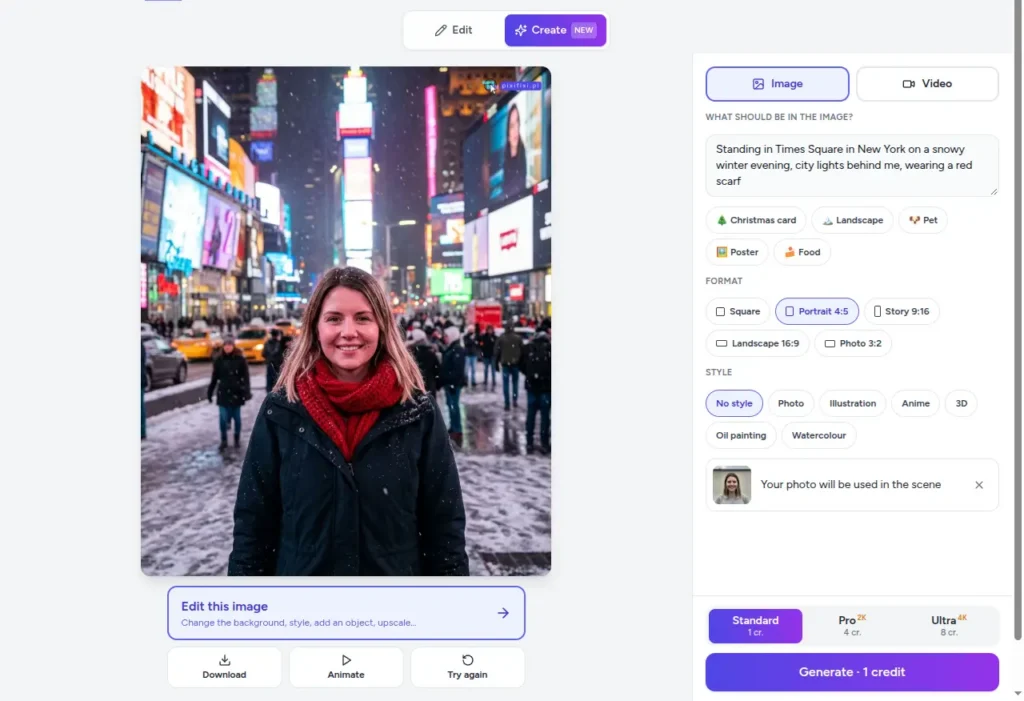
Steps 2–6: the description, “Add yourself” with your photo, the format and the finished image with “Edit this image”, “Download”, “Animate” and “Try again”.
How to keep your face looking like you
The most common complaint about AI images from photos is “that’s not me”. Almost always it comes down to the source photo, not the generator. Here is what we found in our own tests in PixiFixi:
The face must fill the frame. The fewer pixels the face has in your photo, the more the AI has to invent. In our tests a portrait from the knees up kept the face and body faithfully, while a full-body square shot taken from far away made the person slimmer and only roughly similar.
Use a sharp, evenly lit photo of at least 1000 px on the long side. Backlight, heavy shadows, motion blur and small thumbnails hide the features the AI needs.
Don’t describe a new face. Words like “younger”, “different eyes” or detailed make-up instructions make the generator redraw your face.
Several people? Say so. If the photo shows a couple or a family, write “the two of them” or “the whole family” in the description; that tells the AI to keep everyone.
Source photo
Typical result
Selfie or head-and-shoulders, face sharp
Best likeness; the scene is built around your face
Waist-up or knees-up portrait
Good likeness and body shape, more room for the outfit
Full-body shot from far away
Weaker likeness; AI may slim or change the body
Group photo with small faces
Faces drift; crop closer before uploading
Turn a photo into anime, Pixar or an oil painting
If you want the same photo in a different art style rather than a new scene, that is image-to-image style transfer (often called img2img). In PixiFixi use Change style: pick anime, Pixar, Ghibli, comic or oil painting and the composition of your photo stays as it was.
Can I use a photo of my pet or a product?
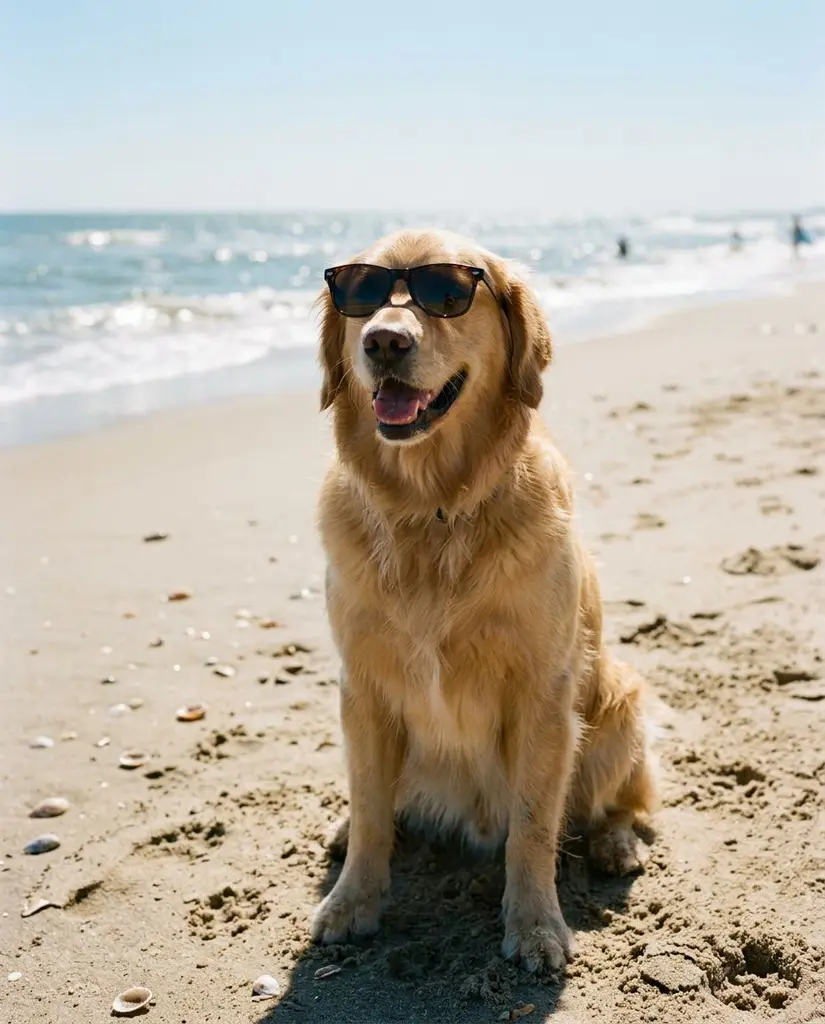
Yes. “Add yourself” works with any subject you upload: a dog, a cat, a handbag, a bottle. Describe the new scene — “my dog on a sunny beach in sunglasses” — and the AI keeps the subject. For product shots on a clean white background, Remove background gives a sharper, more faithful result than generating a new scene.
Writing a good description: examples that work
“A smiling golden retriever wearing sunglasses on a beach” — no photo needed for scenes without people.
A good description answers four questions: what, where, what light, what mood. Some that work well with your own photo:
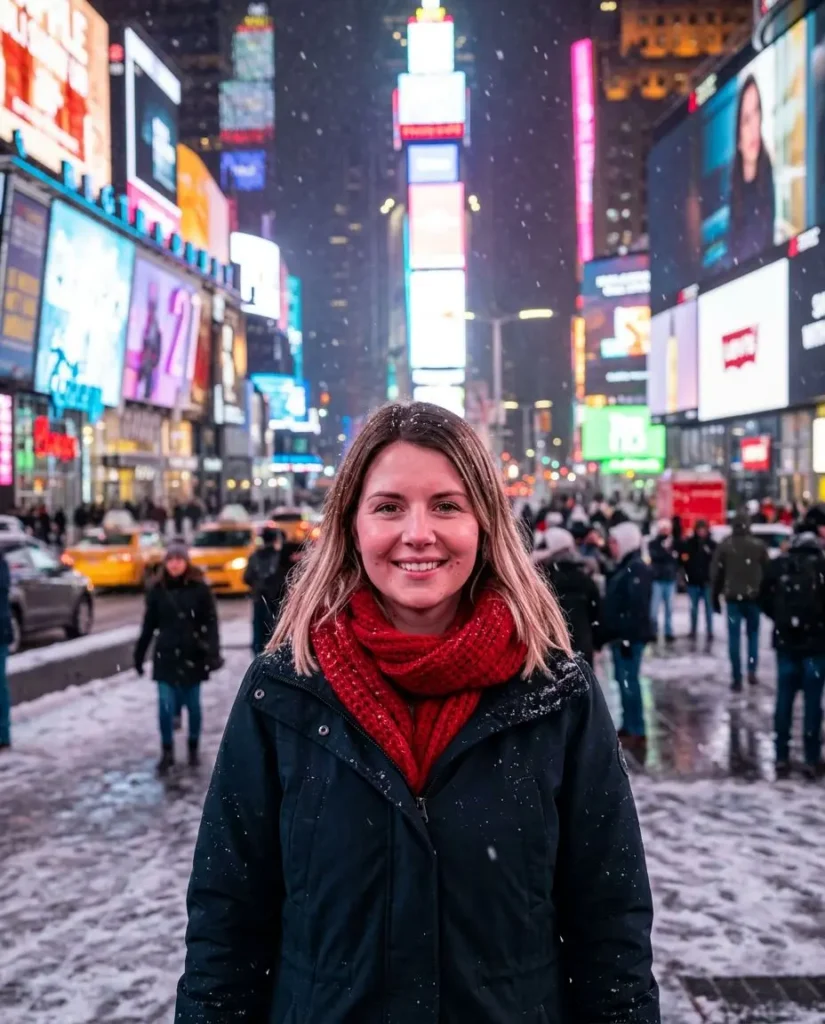
From the same portrait: “Standing in Times Square in New York on a snowy winter evening, city lights behind me, wearing a red scarf”.
“Sitting in a cosy café in Rome, morning light through the window, a cappuccino on the table.”
“Skiing in the Alps on a sunny day, wearing a red ski jacket, snow spraying behind.”
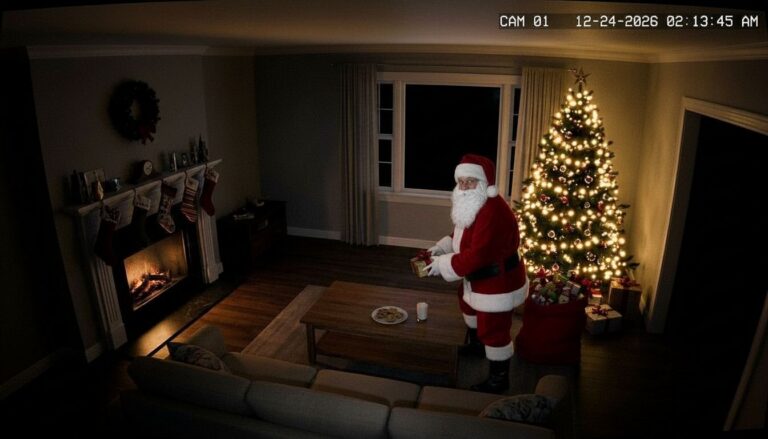
“In a Christmas living room by a decorated tree, wearing a cream sweater, warm candle light.”
“On a rooftop in New York at sunset, city lights behind, wearing a black blazer.”
No photo? The same AI image generator works from text alone — a landscape, a pet, a poster, a dish. Just skip “Add yourself”.
Other ways: ChatGPT and Gemini vs PixiFixi
You can also upload a photo to ChatGPT or Google Gemini and ask for a new scene in the chat. Both are free within daily limits and good at following conversational corrections. What they don’t have are format and style buttons or editing tools for the result, and free daily limits are low. Our comparison of the best free AI image generators lists the free allowances of each.
Common mistakes when creating AI images from photos
Using a tiny or cropped profile picture as the source. Upload the original photo, not a 200-pixel thumbnail.
Packing five ideas into one description. Two clear ideas work better than five vague ones.
Asking for text in the image. Signs and slogans often come out garbled; add text later in a design app.
Expecting a perfect result on the first try. Generate two or three versions on Standard, then upscale the one you like.
What you can do with the result
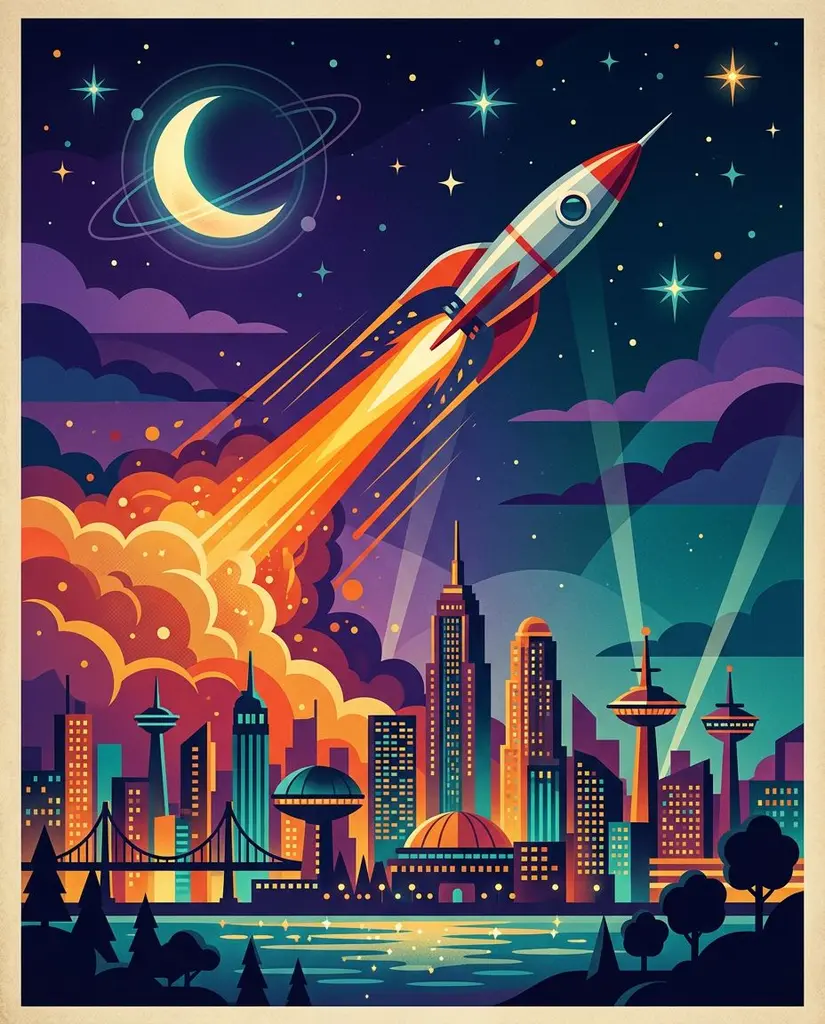
“A retro-style poster of a rocket flying over a city at night, vivid colours” — style: illustration.
Fix a detail — swap the background or remove an object without generating from scratch.
Frequently asked questions
How do I create an AI image from my own photo?
Upload a clear photo to an AI image generator that accepts reference photos (image-to-image), describe the new scene and generate. In PixiFixi: Create → Image → Add yourself → describe → Generate.
Can I create AI images from photos for free?
Yes, to start. In most countries PixiFixi gives new accounts free credits, and a Standard image costs 1 credit. ChatGPT and Gemini also allow a few free images a day.
Why doesn’t the AI image look like me?
Usually because the face is small in the source photo, the photo is blurry, or the description asks for changes to the face. Use a sharp photo where your face fills the frame and describe only the scene.
Can I put two people from one photo into an AI image?
Yes. Upload a photo with both people and mention them in the description, for example “the two of them on a beach at sunset”. Mentioning everyone in the description helps keep them all.
What is the difference between an AI photoshoot and creating an AI image?
An AI photoshoot uses ready-made professional scenes and keeps the focus on a portrait. Creating an image lets you describe any scene you want, with or without your photo.
What photo works best?
A sharp photo taken in daylight, face clearly visible and filling a good part of the frame, from the waist or knees up. Avoid sunglasses, heavy filters and group photos where the faces are tiny.
Can I do this on my phone?
Yes. PixiFixi works in the phone browser with no app to install: tap Create, add your photo from the gallery or the camera, describe the scene and save the result with Download.
Are my photos private?
In PixiFixi your photos and generated images are visible only to you and are not shown in any public gallery. You can delete them from your history.