
In short: PixiFixi’s AI Clothes Changer (Virtual Try-On) lets you change any outfit in a photo using artificial intelligence — pick ready garments from a built-in wardrobe, upload a clothing image, or describe the desired outfit in plain English. The AI preserves the person’s face, pose, and background while replacing only the clothes. Result ready in 30 seconds, costs 1 credit. New accounts get 2 free credits — that’s 2 free outfit changes to start.
Wondering how to change clothes in a photo with AI without using Photoshop? With modern tools like PixiFixi’s Virtual Try-On, you can upload a picture and instantly see yourself wearing a completely different outfit — no design skills required.
In this guide, you’ll learn exactly how to change clothes in a photo step by step using AI.
When to Use AI Clothes Changer?
The most common reasons people change clothes in photos using AI:
- Online shopping decisions — try outfits on yourself before buying, see how a dress, suit or jacket actually looks on your body
- Social media content — Instagram, TikTok, Facebook posts with fresh outfit ideas without an actual photoshoot
- Wedding outfit preview — try on multiple wedding dresses, suits, or guest outfits to make confident choices
- Professional headshots (LinkedIn, CV) — upgrade casual photos to business attire without a new photoshoot
- Costume planning — Halloween, themed parties, costume events — preview your look before committing
- E-commerce product photography — apparel stores can show one model in dozens of outfits
- Fashion blogging and styling — content creators can produce styled photos faster and cheaper
- Body confidence experiments — see how different cuts, colors, and styles flatter your shape before shopping
- Anniversary, birthday, special occasion outfits — visualize the look ahead of time
- Festival, party, summer trip outfits — plan and visualize without the wardrobe stress The most popular use case worldwide is online shopping — buyers use AI clothes changer to virtually try on items they’re considering, reducing returns and increasing confidence in their purchase decisions.
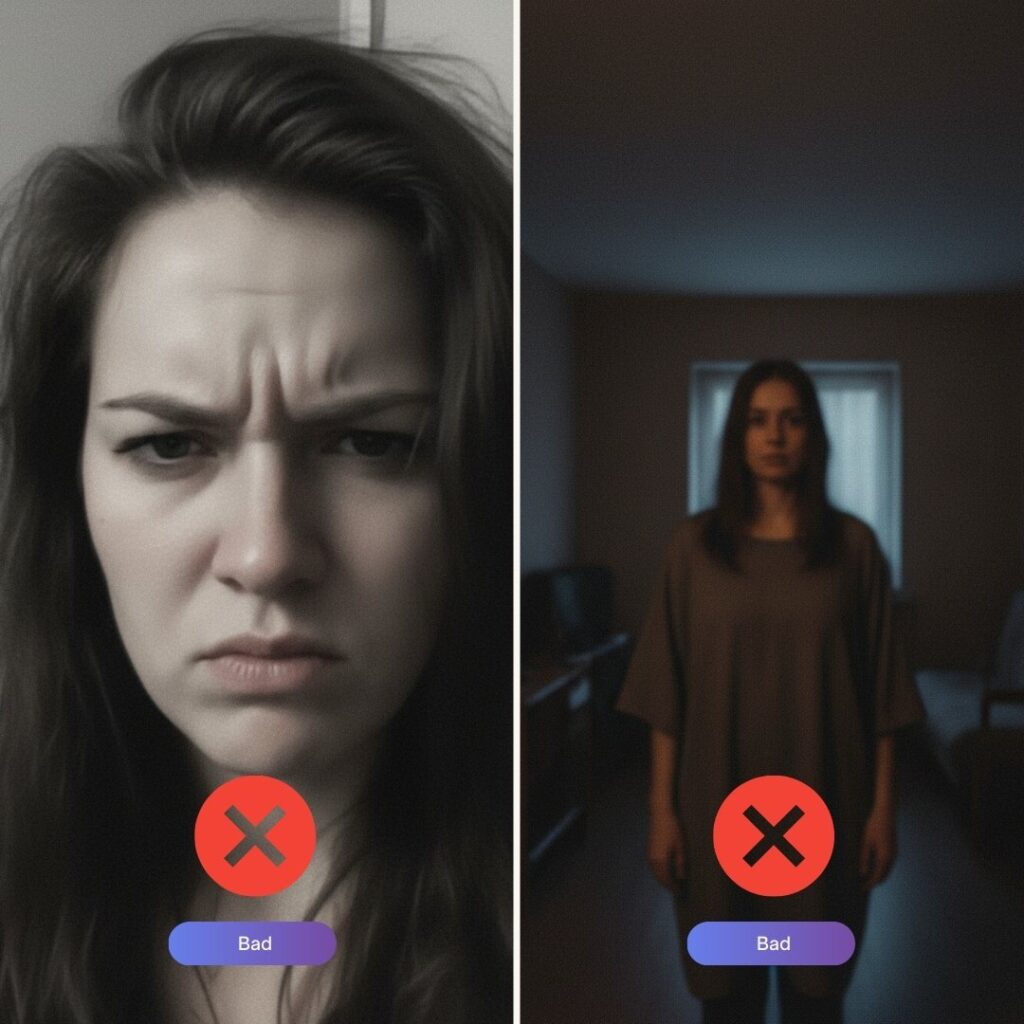
Step 1: Upload a Clear Photo
Start by uploading a high-quality photo of yourself (or the person whose outfit you want to change) inside PixiFixi.
- Use a front-facing photo
- Make sure lighting is good
- Avoid heavy shadows
- Stand naturally (no extreme angles)
- Show the body area where the outfit will appear
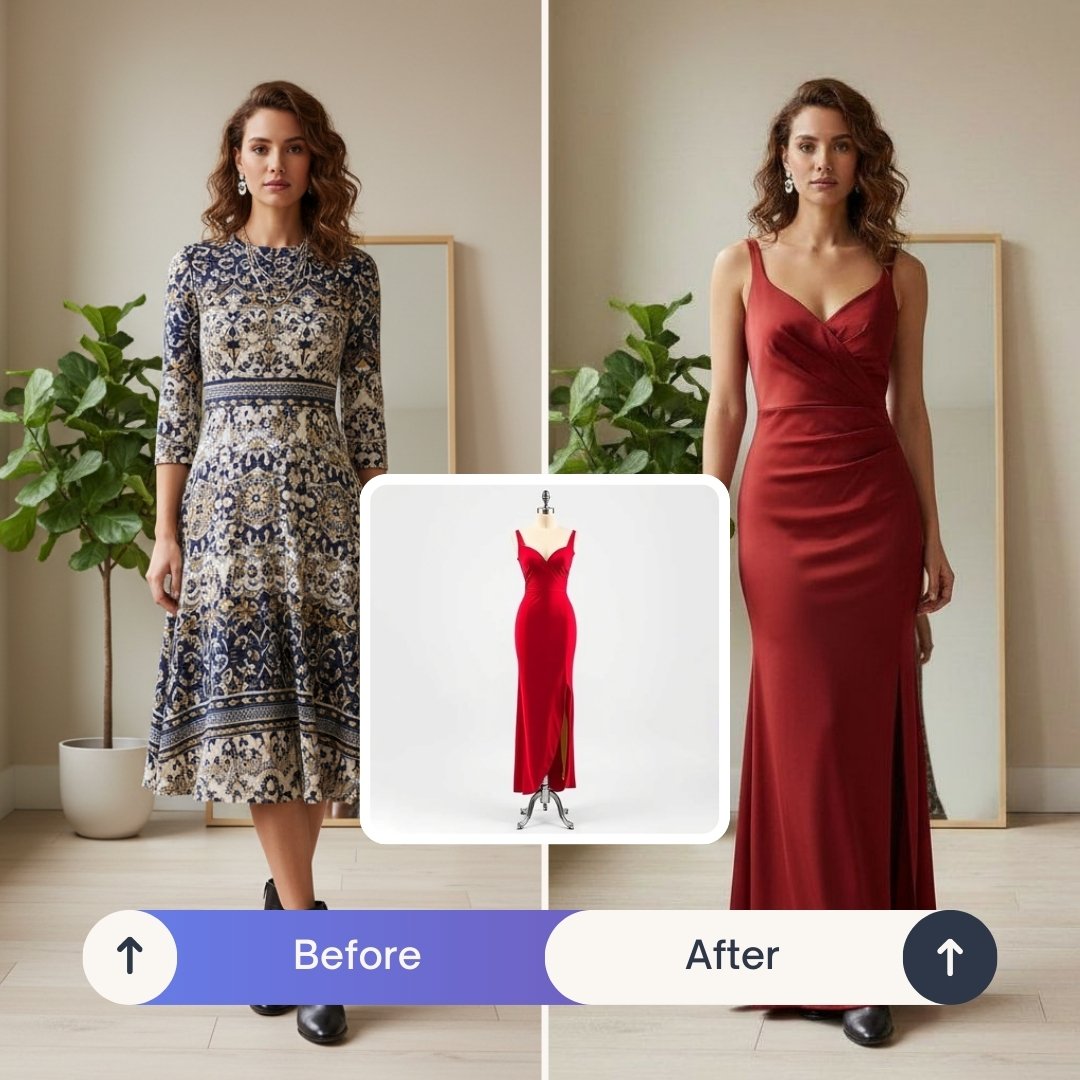
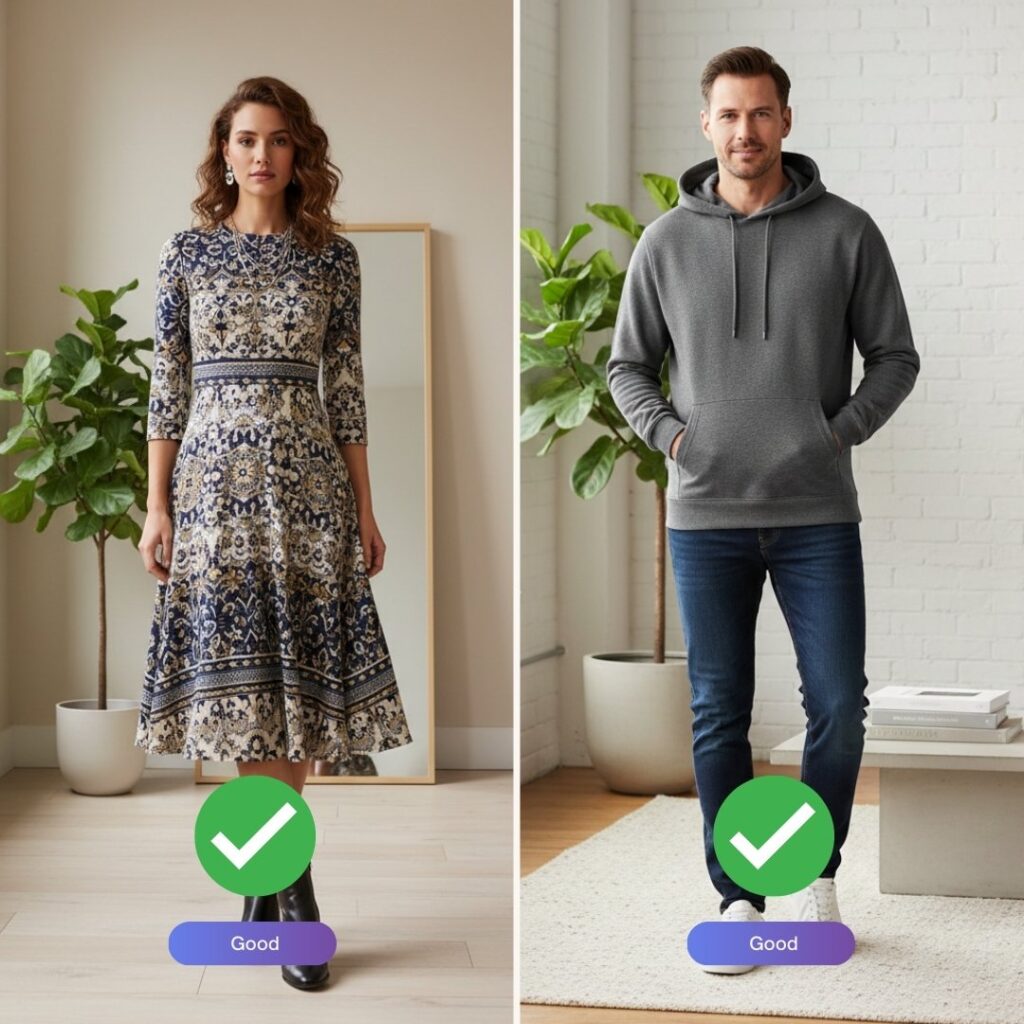
If you want to try on a dress, make sure the photo shows at least down to the knees. If you’re changing a shirt or jacket, a half-body image works perfectly. Examples below of good and wrong photos:
Step 2: Open the “Virtual Try-On” Tool
In the PixiFixi editing panel, select the Virtual Try-On tool. A Wardrobe panel slides up — your virtual closet full of ready-to-wear clothes. The AI automatically detects the clothing area and prepares it for transformation.
You don’t need to manually select the outfit — the AI handles detection and blending automatically.
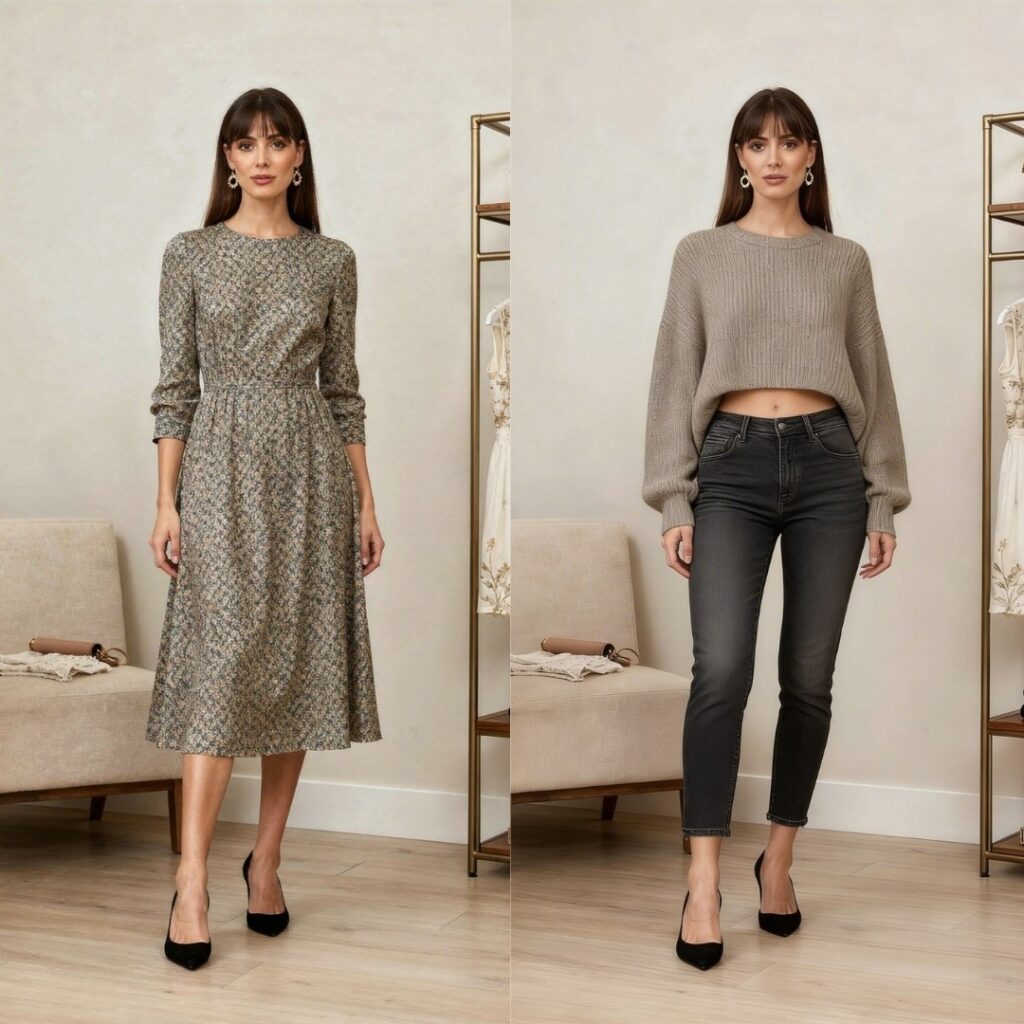
Step 3: Build a Look, Upload or Describe the Outfit
Option A: Build a look from the Wardrobe
Browse ready garments by category — Tops, Bottoms, Dresses, Outerwear, Headwear and Shoes. For tops, bottoms and outerwear you can also pick a fit (slim, regular, oversized or baggy).
The best part: you can combine several pieces at once (e.g. top + trousers + shoes) and build a whole outfit in one step. Your picks appear at the bottom under “Your look.”
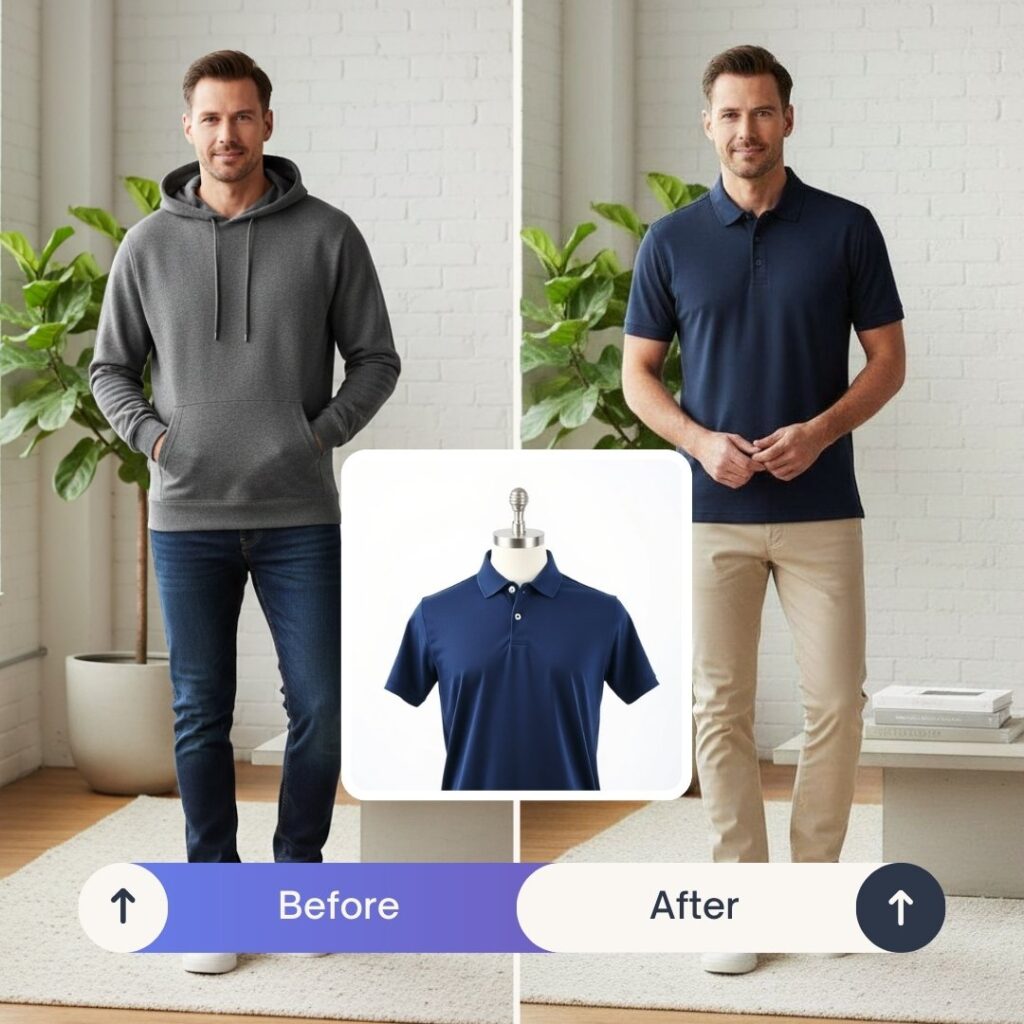
Option B: Upload a Clothing Image
- Upload a product photo from an online store
- Use a clothing image from your phone
- Choose an image from your computer
- Prefer clean or white backgrounds
- Clothing on hangers works best
Example:
Option C: Describe the Outfit with Text
If you don’t have a clothing image, simply describe the outfit in the “describe a garment” field. PixiFixi’s AI will generate it for you. (Describing an outfit and picking garments from the wardrobe are mutually exclusive — typing a description clears your picked look, and vice-versa.)
- Elegant black evening dress with long sleeves
- Oversized beige hoodie, streetwear style
- Navy blue business suit with slim fit cut
- Summer floral dress, lightweight fabric
The AI will generate the outfit and apply it naturally to your body, matching proportions and lighting.
Another example:

Step 4: Click “Try On” and See the Result
PixiFixi’s AI will:
- Adjust proportions to your body
- Match lighting and shadows
- Preserve posture
- Blend the outfit realistically
Within seconds, your updated photo will be ready. Every outfit change costs 1 credit.
Other methods to swap clothes
Method 2: AI Photoshoot (Best for full style transformation)
If you want more than just changing clothes — this is for you.
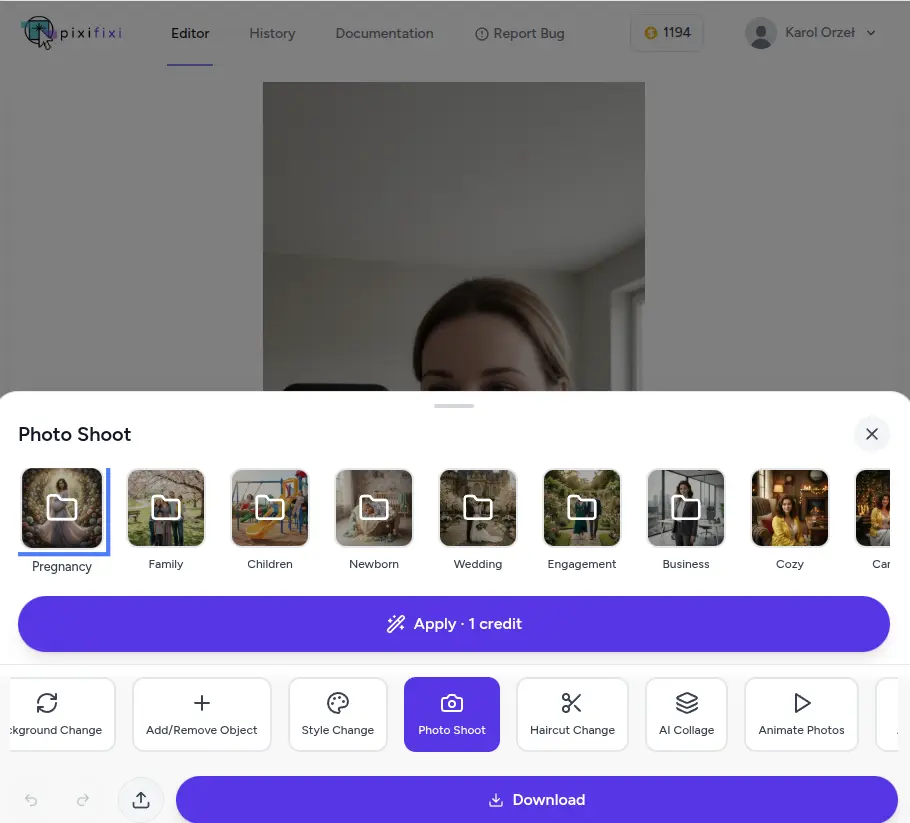
The AI Photoshoot tool transforms your entire image into a styled scene. It changes not only your outfit but also lighting, mood, and overall aesthetic.
You can choose from styles like:
- fashion
- glamour
- business
- casual
- vintage
This is perfect if you want your photo to look like a professional shoot instead of just swapping clothes.
How to use it:
- Upload your photo
- Select AI Photoshoot
- Choose a preset style
- Click Transform
- Download your new image
Method 3: “Other” tool (Best for full control with prompts)
If you want maximum flexibility, use the “Other” tool.
This allows you to describe exactly what outfit you want using a prompt.
PixiFixi supports custom prompt-based editing, so you can generate very specific results.
Example prompts:
- Change outfit to a modern black suit, realistic look
- Swap clothes to streetwear, oversized hoodie, urban style
- Replace outfit with elegant evening dress, soft lighting
- Change clothes to smart casual office wear
How to use it:
- Upload your photo
- Select Other
- Enter your prompt
- Click Apply
- Download the result
Best Prompts for AI Clothes Changer
Whether you upload a clothing image or describe an outfit in text, clarity matters. The clearer your prompt, the better the result. Here are proven prompt examples organized by category:
Professional / Business
- “Black tailored business suit with white shirt and silk tie”
- “Navy blue blazer with light grey trousers and crisp white shirt”
- “Elegant pencil skirt and cream blouse with statement necklace”
- “Charcoal grey three-piece suit, formal business attire”
Casual / Everyday
- “Loose-fit white t-shirt with light blue ripped jeans”
- “Beige oversized hoodie with black leggings”
- “Floral summer dress with denim jacket”
- “Plain cotton polo shirt and khaki shorts”
Formal Evening / Wedding
- “Long emerald green silk evening gown with deep V-neckline”
- “Black tuxedo with bow tie and white pocket square”
- “Burgundy wedding suit with matching tie and brown leather shoes”
- “Champagne-colored mermaid wedding dress with lace details”
Vintage / Retro
- “1950s style pin-up red polka dot dress with petticoat”
- “70s disco outfit — flared trousers, satin shirt, platform shoes”
- “Classic 80s leather jacket with band t-shirt and acid wash jeans” Tip for best results: Use simple, specific prompts. Include color, fabric, cut, and length. Avoid mixing too many styles in one prompt — the AI handles single, well-defined outfits much better than complex multi-style combinations.
Vacation / Summer
- “White linen shirt with khaki linen shorts and straw hat”
- “Tropical print Hawaiian shirt with white shorts”
- “Bohemian maxi dress in coral pink with sandals”
- “Black bikini with sheer beach cover-up”
Tips for Realistic Results
To get the most natural-looking outfit changes:
- Use a clear, well-lit photo — soft natural light works best. Avoid heavy shadows on the body
- Choose a plain or simple background — busy backgrounds can confuse the AI’s edge detection around clothing
- Stand straight and face the camera — straightforward poses produce the cleanest results
- Avoid extreme angles — avoid photos where the body is twisted, partially cut off, or photographed from very high/low angles
- High resolution helps — the AI has more data to work with on sharp, high-res photos
- Switch the fit if needed — slim, regular or oversized changes how the garment sits on the body. Like the result? Use HQ upscale from your History for a larger, sharper version
- For complex outfits, upload a reference image — if you have a specific dress, jacket, or item in mind, uploading its picture works better than describing it
- Test multiple times — AI gives slightly different results each time. If the first try isn’t perfect, run it again
Common Mistakes to Avoid
What we see go wrong most often:
- Overly complex prompts — “elegant red dress with embroidered details, lace sleeves, mermaid cut, satin finish, and a small bow at the waist” → AI gets confused. Better: “elegant red mermaid evening dress with lace sleeves”
- Low-resolution photos — blurry or tiny photos give blurry, imprecise results
- Mixing multiple styles — don’t ask for “formal business casual streetwear” — pick one direction
- Extreme poses — yoga poses, action shots, or photos with arms covering the torso make outfit replacement difficult
- Expecting magic on heavily damaged photos — if the original has poor lighting, low contrast, or focus issues, results will reflect that
- Group photos with overlapping people — for best results, use photos where each person is clearly separated
AI Clothes Changer vs Photoshop, Canva, and Other Tools
| Feature | PixiFixi AI | Photoshop / GIMP | Canva |
|---|---|---|---|
| Time to change outfit | 30 seconds | 30-60 minutes | Limited (templates only) |
| Skills required | None | Advanced (layers, masks, blending) | Low |
| Realistic body adaptation | Yes (automatic) | Manual (masks + blending) | No |
| Lighting consistency | Automatic | Manual color correction | Not adjusted |
| Input method | Wardrobe, upload outfit, or describe in English | Manual layer work | Pre-made templates only |
| Cost per change | 1 credit (about $0.10-$0.30) | License + your time | Pro subscription required |
| Free tier | 2 free outfit changes | No (paid software) | Limited templates |
| Works on mobile | Yes (browser) | Mostly desktop-only | Yes |
For most everyday needs — trying on outfits before buying, social media posts, wedding outfit previews — AI is dozens of times faster than Photoshop and produces more realistic results than Canva templates.
Photoshop still makes sense for professional editorial retouching where you need pixel-level control over every detail. For everyday consumers, AI is the practical choice.
Best Free AI Clothes Changer Apps in 2026
Looking for the best free AI clothes changer? Most tools that swap or change clothes in a photo work in a similar way, but they differ a lot in realism, free allowance, and whether they keep your face. Here’s how PixiFixi compares to other popular AI clothes changers in 2026:
| Tool | Free allowance | Keeps face & body | Input methods | Best for |
|---|---|---|---|---|
| PixiFixi | 2 free try-ons | Yes | Wardrobe, upload, or text | Realistic everyday try-on |
| Generic “AI clothes” apps | Limited / watermark | Varies | Text only | Quick experiments |
| Photoshop (generative fill) | No free tier | Manual | Manual layers | Pro retouching |
| Template editors (Canva) | Limited | No | Templates | Graphics, not try-on |
For a genuinely free start with realistic results that keep your face, PixiFixi’s 2 free credits let you change clothes twice at no cost — then it’s just 1 credit per change with no subscription. That mix of a real free allowance, three input methods (wardrobe, upload, or text), and face-preserving results is what makes it stand out among free AI clothes changers.
How Much Does AI Clothes Changer Cost?
PixiFixi runs on a credit system with no subscription required.
- Every outfit change costs just 1 credit — Virtual Try-On has no quality tiers; it runs on a single engine tuned for try-on, so the price is the same every time.
- Like a result and want it bigger? Use HQ upscale from your History for a sharper, higher-resolution version. Credit packages:
| Package | Price (USD) | Outfit changes |
|---|---|---|
| Free start | $0 | 2 (new account bonus) |
| 10 credits | $2.99 | 10 |
| 30 credits | $6.99 | 30 |
| 60 credits | $9.99 | 60 |
| 100 credits | $18.99 | 100 |
| 200 credits | $34.99 | 200 (best per-credit price) |
No subscription — buy only what you need. Credits don’t expire. Available in USD, EUR, GBP, and INR.
For Indian users, INR pricing is automatically detected (currently 1 credit ≈ ₹20). For European users, EUR pricing applies. Payment methods include card, Google Pay, Apple Pay, PayPal, and UPI (for Indian users).
Is AI Clothes Changer Safe and Ethical?
AI clothing tools are safe when used responsibly. Recommended use:
- Only edit photos you own or have explicit consent to modify
- Don’t create misleading or deceptive content about other people
- Don’t use for fraud — fake profile photos, identity manipulation, or fake social media
- Be transparent in commercial use — if you’re an online retailer using AI to show clothes on a model, disclose this when relevant
- Respect privacy — your uploaded photos are used only to generate your result and are stored on secure servers. PixiFixi does not use your photos to train AI models PixiFixi has built-in content moderation that automatically blocks inappropriate uploads and outputs. The platform is designed for everyday consumer use — shopping, social media, professional photos, creative projects.
Frequently Asked Questions About AI Clothes Changer
Partially. Every new account receives 2 free credits, which is enough for 2 outfit changes. Additional credits start at $2.99 for a 10-credit package. There’s no subscription — you buy only the credits you need, and they never
expire.
Anything from casual t-shirts and jeans to formal suits, evening gowns, wedding dresses, traditional clothing, sportswear, and costumes. AI handles fabric textures, patterns, layering, and accessories. You can pick ready garments from the wardrobe, describe the outfit in plain
English, or upload a reference clothing image.
Yes. This is a core feature of the Virtual Try-On tool — AI specifically preserves facial features, hair, and pose while replacing only clothing. The same person is recognizable in the result, just wearing different clothes.
Yes, but works best when people are clearly separated. For overlapping figures in tight group shots, results may be less precise. For best results in group photos, individual portraits cropped from the group photo work better.
Yes. You can upload a photo of any garment — on a hanger, flat lay, or worn by another person — and AI will adapt it to your photo. The clothing image can be from an online store, your own wardrobe, or a fashion magazine.
Three approaches: (1) try again — AI gives slightly different results each time, (2) refine your prompt or switch the fit (slim, regular, oversized), (3) build a different look from the wardrobe or upload your own garment image.
Yes. PixiFixi allows full commercial use of generated images. Many small online stores use Virtual Try-On to show their products on different models or in different styles without organizing photoshoots. Invoices for business use can be issued upon
request.
Usually 20-40 seconds per outfit change. You can close the browser and come back later — results are saved in your History tab.
You can upload JPG, JPEG, PNG, WEBP, and HEIC (iPhone) photos. Maximum file size is 20 MB. Results are always downloaded as high-quality JPG.
Yes. PixiFixi runs entirely in your browser on desktop, tablet, and mobile (iOS and Android). No app installation required. Upload from your phone, get the result on your phone.
Final Thoughts
If you’ve ever wondered how to change clothes in a photo without complicated software, AI makes it simple. Upload your image to PixiFixi, open Virtual Try-On, build a look from the wardrobe (or upload/describe an outfit), and see yourself in a completely new style instantly. For a swimwear-specific walkthrough, see our guide on changing clothes to a bikini or swimsuit with AI.